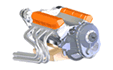
- Installation Instructions for the EPI Mark-9 PSRU -
Information critical to the safe installation and operation
of your EPI Mark-9 Propeller Reduction Gearbox.
NOTE: All our Products, Designs, and Services are SUSTAINABLE, ORGANIC, GLUTEN-FREE, CONTAIN NO GMO's, and will not upset anyone's precious FEELINGS or delicate SENSIBILITIES
Document Number 240002
REVISION HISTORY
| ID | Date | Description |
|---|---|---|
| A | 04/03/98 | Initial Release. |
| B | 04/03/98 | Added paragraph on recommended idle speed; added safety warning on cover and first text page; made minor editorial corrections. |
| C | 04/13/98 | Added sections on propeller installation, lubricants, gearbox oil-pressure monitoring; expanded PLUMBING section; clarified instructions on bolt torque, drive quill play, and other installation details; expanded EMERGENCIES section; added Appendix-A; made minor editorial corrections. |
| D | 08/22/01 | Revised order of sections to place REQUIRED INSTRUMENTATION section at front and reworded warnings in that section; Revised instructions on governor installation and propeller installation; Removed Appendix A; Revised instructions on operation without propeller installed; Removed instructions relating to installation of shafts with skip-tooth configuration. |
| E | 01/29/02 | Slight rewordings in various sections to improve clarity. |
| F | 03/05/02 | Revised first section; Added intro; Divided first section into REQUIRED and RECOMMENDED equipment. |
| G | 03/08/02 | Clarified wording of 1.1; revised time limit in 1.1.3 from one minute to five minutes cumulative; Clarified wording of 5.0 and 6.0. |
MARK-9 GEARBOX INSTALLATION INSTRUCTIONS
THIS DOCUMENT CONTAINS INFORMATION CRITICAL TO THE SAFE INSTALLATION AND OPERATION OF YOUR PSRU.
PLEASE TAKE THE FEW MINUTES NEEDED TO READ AND UNDERSTAND THIS DOCUMENT BEFORE PROCEEDING WITH THE INSTALLATION OF YOUR PSRU.
1.0 INTRODUCTION
This document describes the procedures and methods recommended for the installation of the EPI Mark-9 PSRU onto an engine.
This document is not an effort to demonstrate that we are smarter than you are. It simply presents proven methodology for the installation of a complex, high-performance piece of machinery. The procedures defined here may not be the only way, but they have been developed through experience and knowledge, and have been demonstrated to be successful. Deviate at your own risk.
The EPI Mark-9 PSRU is very strong for the job it was intended to do, but many of the parts can easily be damaged if not handled correctly. The instructions assume that the installer is familiar with working on aircraft powerplants and with standard aircraft practices. It is also assumed that the installer has access to, and is familiar with the operation of such an elementary device as a torque wrench.
Before describing the installation procedures, the first section defines two categories of additional equipment needed for the installation.
The first is instrumentation which EPI considers flight-critical, and therefore mandatory to be operational prior to every flight. The second category is equipment which EPI highly recommends in the interest of safety.
The powerplant onto which you are installing this gearbox is unlike anything you have flown before, and is far more complex. By installing the recommended equipment, you are giving yourself an additional margin of safety, specifically an improved ability to detect potential trouble with the PSRU before it becomes an emergency.
1.1 REQUIRED PSRU INSTRUMENTATION
EPI considers it to be mandatory that each aircraft which uses a powerplant with the EPI Mark-9 PSRU must contain, on the instrument panel, in a location at least as visible as the other engine instrumentation, the following items of instrumentation:
- an annunciator light to alert the pilot that the Chip Detector (supplied installed in the PSRU) has activated,
- a pressure gauge, with a range from 0 to at least 70 psig, which accurately displays the oil pressure at the Front Gallery tap on the gearbox, and
- a temperature gauge, with a range from at least 100°F to 250°F, which accurately displays the temperature of the oil which is exiting the gearbox.
This instrumentation is critical to the early identification of potential gearbox problems which could cause complete and sudden stoppage of the propeller. These instruments are no less important than the engine oil pressure and temperature gauges required by FAR 91.205{b}.
(Note that 14-CFR-91 applies to aircraft certificated in all categories, including normal, utility, aerobatic, restricted AND experimental.)
EPI considers these following three pieces of equipment to be FLIGHT CRITICAL. In no case should flight be attempted without all three of these pieces of instrumentation installed and operating correctly.
1.1.1 Chip Detector
The EPI Mark-9 PSRU is built and tested with the approved Chip Detector installed. The Chip Detector is located in a position so as to enable it to detect the presence of ferromagnetic particles in the gearbox exit oil. Any presence of such particles is sufficient indication of abnormal wear or deterioration of the gearbox internals so as to warrant termination of flight as soon as the pilot reasonably can do so safely, followed by an inspection of the Chip Detector and of any other systems as required, in order to determine the cause of the warning.
A chip detector is REQUIRED on rotorcraft drive system gearboxes (FAR 27.1337{e}), and EPI considers the potential loss of propulsion as a result of gearbox damage to be no less dangerous than a similar loss on a rotorcraft.
The wiring of the Chip Detector can be accomplished as follows: Power from the main bus is supplied to one side of the annunciator light. The other side of the annunciator light is connected to the Chip Detector terminal. When particles are detected, the Detector completes a circuit to ground and lights the annunciator. It is recommended that a momentary contact switch be wired in parallel with the detector. Operation of that switch should be part of the preflight checklist to test the operation of the annunciator.
If, after the gearbox is put into operation, the chip detector triggers an alarm, remove it and examine the particles adhering to the magnet, and contact EPI at once to discuss the findings.
If the chip detector triggers an alarm in flight, reduce power as soon as it is safe to do so, and land as soon as safely possible. Determine the cause of the alarm and resolve the problem before considering any further flight.
1.1.2 Gearbox Oil Pressure Gauge
Most of the heavily-loaded bearings in the gearbox are journal bearings, just the same as the bearings in the engine. Unlike the bearings in a Lycoming or Continental, even a momentary interruption of the pressurized oil supply to the gearbox (or engine) bearings imposes a significant risk of damage to and failure of these bearings.
The Gearbox oil pressure is a FLIGHT-CRITICAL parameter, and it is essential that there is an accurate oil pressure gauge installed in the aircraft which displays gearbox front gallery oil pressure to the pilot.
The gearbox is supplied with a pressure tap at the front of the idler shaft bore (described in detail in the PLUMBING section) for measuring the oil pressure in the front gallery of the gearbox. It is this gallery which supplies lubrication oil to the front bearings on the propshaft, drive gear and propeller thrust bearings. Any time the PSRU is operating, these bearings require a constant supply of pressurized oil. During operations other than ground-idle, the oil pressure must not be less than 25 psi.
PLEASE NOTE that relying on the engine oil pressure instrument OR on a gauge displaying gearbox oil supply pressure IS NOT SUFFICIENT.
It has been demonstrated in testing at EPI that the pressure in the front gallery can decrease to dangerously low levels and NEVER SHOW A CHANGE ON THE ENGINE OIL PRESSURE OR THE SUPPLY PRESSURE GAUGES.
The gearbox should never be operated at any power setting above ground idle if the front gallery oil pressure is below 25 psig. If this limit is reached in flight, reduce power as soon as conditions will allow a power reduction safely, and land as soon as safely possible to determine the cause of the problem.
1.1.3 Gearbox Oil Temperature Gauge
The gearbox depends on the circulation of engine oil not only for lubrication, but also for cooling. The meshing of the gears generates a significant amount of heat, and the flowrate of oil through the gearbox has been designed to carry off that heat if the gearbox is operating properly.
The gearbox exit oil temperature is a FLIGHT-CRITICAL parameter, and it is essential that there is an accurate oil temperature gauge installed in the aircraft which displays gearbox exit oil temperature to the pilot. Similar instrumentation is considered mandatory on many rotorcraft (which, as you already know, are completely dependent on the health of their gearboxes).
If something in the gearbox starts to fail (a bearing, for example) the gearbox exit oil temperature will begin to rise very quickly, giving the pilot a certain amount of warning about the impending problem. Even though the oil exiting the gearbox is returned to the engine sump, YOU CANNOT RELY ON THE ENGINE OIL TEMPERATURE GAUGE for this function.
Testing at EPI has demonstrated that the gearbox exit oil temperature can be rising significantly above its maximum limit, and yet produce no significant change in the temperature of the oil in the engine sump.
During initial gearbox break-in and testing, gearbox exit oil temperature is monitored very carefully. For approximately the first hour of operation (at power levels less than 300 HP) the exit oil temperature is quite high while the gear teeth (very hard and smooth as manufactured) are wearing in. The completion of this process is indicated by a rather quick decline in exit oil temperature to normal values.
The sensor for the oil temperature gauge should be installed in the 1/8-NPT threaded boss on the lower port side of the gearbox case.
Before attempting flight, verify the correct operation of this temperature gauge by placing the sensor in a cup of boiling water and noting the reading on the gauge (212°F ±5 at sea level).
At no time should the gearbox oil temperature be allowed to exceed 235°F. If this limit is reached in flight, reduce power as soon as conditions will allow a power reduction safely, and land as soon as safely possible to determine the cause of the overtemperature.
If the temperature has been allowed to exceed 235°F for more than five minutes (cumulative), there is a significant risk that the strength of the gears may have been compromised, and the gearbox must be returned to EPI for a complete inspection.
1.2 RECOMMENDED EQUIPMENT
In addition to the mandatory equipment described above, EPI highly recommends the following equipment:
- The addition of two additional annunciators to the aircraft instrumentation system, prominently located so as to immediately attract the pilot’s attention, for the purpose of notifying the pilot anytime the PSRU front gallery oil pressure is below 25 psi or the PSRU exit oil temperature is above 235 °F.
- The inclusion, in the engine control system, of a “soft-touch” rev limiter which will prevent an engine runaway in the case of a PSRU failure. If the PSRU fails an
any of several ways (drive shaft failure, gear failure, governor drive failure, etc.) the engine will become unloaded instantly, and will, in all likelihood, over-rev
and physically destroy itself. If you experience a PSRU failure, your attention will be consumed dealing with the resulting emergency. The last thing you need is the
additional problem of dealing with an engine fire caused by the explosion of the engine.
The term “soft-touch” is somewhat of a generic, referring to the type of rev limiter which skips firing pulses on different cylinders, in a pseudo-random manner, while never skipping any one cylinder too many times in a row. That action minimizes the accumulation of explosive mixtures in the exhaust system, and therefore minimizes the probability of an explosion which could fracture the exhaust system.
2.0 CRATING
Please note how the parts are packed and mounted in the crate. Please save all the packing and mounting materials (screws, bolts, washers, hydraulic port screw-on covers, etc.). One of the plastic sacks could be used to hold them all, and they could be stored back in the crate. These will be very useful when you send the gearbox back for inspection and/or repair.
3.0 UNPACKING
When you remove the crate cover, you will see the flywheel assembly, a plastic sack of fasteners, the drive quill, and the drive quill spacer. The flywheel assembly is attached to the shelf with screws.
After the hardware is removed from the top shelf, remove the screws along the two edges holding the shelf in place. The shelf can then be removed, revealing the gearbox. The gearbox is attached to the crate floor with four 3/8-24 allen-head capscrews, which have the nuts and pairs of washers underneath the crate.
4.0 GOVERNOR
The gearbox is delivered with the governor installed, in order to hold the drive mechanism in place and to prevent the contamination of the governor, the drive and/or the plumbing passages. It is attached using hardware-store fasteners, and it is not torqued to spec. The AN nuts and washers for final installation are attached to the governor control arm.
Leave the governor attached to the gearbox until after the gearbox has been attached to the engine and bolted in place. When you install the gearbox onto the engine, you will notice that it impossible to install and torque the attachment bolt adjacent to the governor with the governor in place. In order to install this 7th bolt, you will (LATER) remove the governor, install the 7th bolt, then reinstall the governor as directed in Section 9.0.
5.0 CRANKSHAFT PREPARATION
Before installing the gearbox, remove the pilot bushing from the engine crankshaft. Into the large bore in the end of the crankshaft, install the supplied spacer bushing (approx. 1.702 OD, approx. 0.250 long). It should be an easy slip fit, and will protrude from the crankshaft flange about 0.060"
This spacer is to limit the movement of the drive quill, and can only be installed one way. It is positioned longitudinally by the chamfer on the crankshaft bore.
Next, using acetone, alcohol, or an equivalent evaporating cleaner (NOT GASOLINE), carefully clean the flywheel flange of the crankshaft and the mating surface of the flywheel.
6.0 FLYWHEEL INSTALLATION
There are two parts to be installed in this step: the flywheel and the splined drive plate. The (aluminum) flywheel plate is clamped between the drive plate and the crankshaft flange.
If your crankshaft has a dowel on the flywheel flange, the orientation of the flywheel and splined driveplate will be correctly determined by the dowel. If the crank does not have a dowel, it will have a hole where the dowel would have been located. In order to maintain the designed orientation of the indexing tooth gap in the ignition trigger wheel, the dowel hole in the flywheel and the splined derive plate (between two of the six mounting bolt holes) must be positioned over the index dowel hole in the crankshaft flange.
Taking care not to get any dirt or grease on any of the parts, install the flywheel assembly and drive plate onto to the crankshaft flange. Next, install the six supplied 7/16-20 allen-head capscrews (no washers!). We recommend 85 #-ft of torque on the flywheel bolts, with a very light coating of red Loctite applied to the bolt threads.
IT IS ESSENTIAL that no Loctite or lubricant of any form find its way onto the flywheel flange of the crankshaft. Any excess Loctite on the bolt threads will bleed into the space between the flywheel and crankshaft. THEREFORE, use caution that no excess Loctite is applied to the bolts. If you have any question about how much is too much, experiment by applying some to one of the flywheel bolts and threading it into the supplied 7/16-20 test nut. No Loctite should bleed out of the threads after the nut is fully engaged on the threads (about 8 turns).
After the flywheel is satisfactorily installed and torqued, manually move the starter pinion gear into its fully-engaged position with the flywheel ring gear, to verify full engagement and no interferences.
7.0 DRIVE QUILL SHAFT INSTALLATION
FIRST, if you don’t know where or what the “drive quill shafts” are, then you have no business working on this gearbox.
For the same reason that you wouldn’t walk on metal airplane wings with hobnail boots, similarly you MUST treat both drive quills with the utmost of care.
Metal wings can withstand large bending and torsional loads, but they are delicate in other loading modes. In the same way, these quill shafts have been designed and manufactured to withstand extreme levels of torsional stress, but ANY SCRATCHES OR NICKS IN THE SURFACE OF EITHER DRIVE QUILL CAN RENDER IT INCAPABLE OF SURVIVING IN FLIGHT. If you have any doubts about the condition of either of these quill shafts, contact EPI for instructions before proceeding further.
For convenience, the inner drive quill shaft was removed from the gearbox prior to shipping and packed in bubble wrap. LEAVE IT WRAPPED UNTIL YOU ARE READY TO INSTALL IT.
Examination of the inner drive quill shaft will reveal that both splines are identical. Since the splines are identical, it is POSSIBLE to install the shaft INCORRECTLY. If theshaft is installed incorrectly, the gearbox will not install on the engine.
Note that one end of the quill shaft contains a female drive slot. That end is the forward end of the quill shaft which mates with the male drive tang on the scavenge pump.
Before installing the drive quill shaft, coat the splines at both ends of the drive quill as well as the oil pump drive slot, liberally with Bostik NEVER-SEEZ ™.
To install the drive quill in the gearbox, position the gearbox on a convenient surface with the bellhousing facing upward. Look down the center of the drive gear and note the orientation of the male drive tang on the scavenge pump. Orient the female slot in the drive quill to roughly 90° away from the angular orientation of the drive tang, and install the drive quill. At this point, the drive quill is not yet properly installed.
Next, let go of the quill and slowly turn the prop shaft until the quill engages the scavenge pump drive tang and drops into place. Verify that the drive tang has engaged by removing the shipping cover from the scavenge pump output port (the AN-816-8D on the starboard side of the pump). Look into the port while rotating the quill by hand, and verify that the pump gears move when the quill is twisted.
NOTE: WHEN INSTALLING OR REMOVING THE INNER QUILL SHAFT, BE EXTREMELY CAUTIOUS THAT YOU DO NOT TOUCH, SCRATCH OR NICK THE INSIDE OF THE OUTER QUILL WITH THE INNER QUILL. IT IS ESPECIALLY CRITICAL WHEN REMOVING THE GEARBOX TO BE SURE THAT THE INNER QUILL DISENGAGES FROM THE ENGINE DRIVE PLATE SO AS TO PREVENT THE INNER SHAFT FROM HANGING UP IN THE ID OF THE OUTER SHAFT.
THESE ARE STANDARD AIRCRAFT PROCEDURES, AND IF YOU ARE TOO HAMFISTED TO TAKE PROPER CARE OF THESE DELICATE PARTS, THEN YOU HAVE NO BUSINESS WORKING ON THIS POWERPLANT AT ALL.
8.0 GEARBOX INSTALLATION
First, obtain two 3/8-16 bolts approximately 4 inches long, with not more than 1” of thread length. Cut the heads off these two bolts and set them aside. These modified bolts are the guide pins which will help you install the gearbox without damaging the drive quill.
Using acetone, alcohol, or an equivalent evaporating cleaner (NOT GASOLINE), clean the bellhousing flange on both the engine block and the gearbox housing.
Now, install the two guide pins into the engine block just above the bellhousing dowels. When installing the gearbox on the engine, three people make it quite a bit easier. With the help of an assistant, lift the gearbox into position on the guide pins and orient it so the mounting face is parallel to the engine block. While you move the gearbox toward the engine, have a third person assist by slowly rotating the prop flange back and forth until the inner quill spline engages the flywheel driveplate spline.
After the spline engages, push the gearbox onto the engine dowel pins (where it will likely bind). While an assistant grasps the propshaft and holds the gearbox parallel to the engine block, install the top and the two bottom gearbox attach bolts and washers (they are the seven supplied 3/8-16 allen head capscrews and AN-960-616 washers) and evenly snug them up to draw the gearbox up to the engine. Remove the guide pins and install and snug three of the remaining four gearbox attach bolts. (You will not be able to install the bolt adjacent to the governor at this time.)
Before torqueing the gearbox attach bolts, verify that there is a slight amount of back-and-forth free play in the drive quill. If the shaft is not free, find out why before proceeding. Use your own judgment on the bolt torque in the aluminum block. (We recommend 35 #-ft on an aluminum block.)
After torqueing the six gearbox attach bolts, again reach up into the drive plate area and verify that there is still a small amount of longitudinal free play in the drive quill. It MUST be able to be moved forward-and-aft about 0.010" to 0.025". If it does not move freely that amount, stop here and determine why. Contact EPI for assistance.
We use 35 #-ft (dry) on the eight 3/8-16 bolts which attach the engine mounts to the gearbox mounting pads.
9.0 GOVERNOR INSTALLATION
Remove and save the NEW mounting nuts (AN-365-516) and washers (AN-960-516) from the governor control lever. Remove the hardware-store nuts which retain the governor in place. Carefully remove the governor and store it in a clean Ziploc bag.
Install the seventh gearbox attach bolt and washer and torque it as described in the previous section, being exceptionally cautious not to knock any foreign material into any of the cavities on the governor pad.
Woodward recommends coating the governor gasket (MS 9144 01) with Dow Corning 7 release agent), making removal and re-use less of a problem.
The tightening of the four fasteners which hold the governor to the case critical. We have observed dramatic wear and fretting of the governor drive splines in certain applications. Because the loads on that spline are so low, we think that this severe (and quite unpredictable) wear is due to misalignment of the governor with the drive caused by uneven or unsequenced tightening. We have also observed, in extreme cases, that misalignment of the governor can severely bind the governor drive, leading to premature failure of the governor drive gears.
Using the supplied AN fasteners, install the governor on the pad. Using the following sequence, tighten the nuts to 50 #-in. Repeat the sequence, tightening to 80 #-in. Repeat the sequence, tightening to 100 #-in, then recheck the torque on all 4 nuts.
DO NOT attempt this operation with a "pound-feet" torque wrench. 100 pounds-inches of torque is JUST A BIT MORE THAN 8 pound-feet. A 100-pound-feet wrench will not be accurate at that small a percentage of full scale. You are attempting to be an aircraft mechanic, so GET THE RIGHT TOOLS.
The recommended SEQUENCE (facing the mounting pad) is: 1-upper left; 2-lower right; 3- lower left; 4-upper right.
10.0 GOVERNOR ADJUSTMENTS
If a governor was delivered with the gearbox, it has been adjusted to limit the maximum engine speed to that value specified by the customer. There should be no further need to adjust it.
If it is decided that the governor adjustment is unsatisfactory, the high-speed adjustment has about +100 ERPM adjustment range, to allow fine-tuning if needed. That adjustment is lockwired, so if it is necessary to alter the adjustment, it will be necessary to remove the factory lockwire. After the adjustment has been set to the satisfaction of the installing personnel, the bolts must be lockwired in place in the same manner as when it was delivered
11.0 PLUMBING
There are four plumbing connections to be made on the gearbox.
- The first connection is the oil supply line, located on the upper back portion of the gearbox case, (just forward of the bellhousing), slightly port of center. It is an AN-816-6D fitting. Attach an appropriate supply line from the engine which provides at least 40 psi of filtered, cooled engine oil to the gearbox at max input RPM.
- The second connection is the line which returns scavenged oil from the gearbox to the engine. That connection is an AN-816-8D fitting at the front of the gearbox on
the lower starboard side. Attach an appropriate line to this fitting.
We strongly recommend the installation of a dedicated oil filter in the scavenge line, and frequent examinations of the contents of the filter to check for the production of non-ferrous particles which are not detected by the chip detector. - The third connection is a breather (MANDATORY for correct operation of the scavenge system). The breather port is located toward the front of the
case, on the starboard side, at the approximate level of the propshaft. It is tapped with a 1/2-NPT thread, and requires the installation of an appropriate hose adapter.
We suggest plumbing the other end of the breather hose to one of the rocker covers or to the engine valley. If the breather is connected to the engine, IT IS ESSENTIAL THAT THE INTERNAL PART OF THE ENGINE IS VENTED TO THE OUTSIDE, preferably through a breather filter device.
Do not connect the gearbox breather line to the engine induction air supply, because an engine backfire can dislodge one of the gearbox seals. (That happened during one of our testing sessions.) - The fourth connection is the pressure tap for the gearbox oil pressure gage or sensor. Connect the appropriate hose to the an AN-822-4 at the front of the gearbox housing, on the lower surface below the idler shaft cover.
12.0 LUBRICANT
All our testing on this gearbox has been with a high-quality SAE 20W-50 multi-viscosity automotive engine oil, suitable for API Service SJ/SH (VALVOLINE All-Climate). Other oils (such as Castrol-GTX or equivalents) might also work, but we have no experience with them.
We specifically have no experience using any form of aircraft oil with this gearbox. Although aircraft oil works fine with the gears in the GTSIO-520, we understand that liquid-cooled engines are not happy with the additive package (Ashless Dispersant) found in aircraft oils, especially with regards to combustion-chamber deposits and detonation.
13.0 INITIAL STARTUP
Undoubtedly, you have already run your engine without having the gearbox attached. However, the first startup after installation of the gearbox IS CRITICAL!
It is possible to do this initial startup prior to installation of the propeller. Some people prefer to do the first startup of the engine/gearbox before installing the prop, in order to check for leaks without having to worry about losing precious body parts. If you want to do this, you will need to obtain a propshaft blanking plate and O-ring from EPI in order to seal the prop end of the propshaft. Otherwise huge amounts of oil will be pumped out of the gearbox through the propshaft.
Prior to starting the engine for the first time after installing the gearbox, it is essential to pre-oil the system (just the same as you would a new engine). REMEMBER that the gearbox bearings are of the journal-bearing design (same as the engine). The gearbox lubrication system requires a significant volume of oil before oil pressure can be developed, and running the gearbox without lubrication can damage the bearings.
Before starting to pre-oil, remove the chip detector core from the gearbox. Using a standard pre-oiling tool (an adapter to run the oil pump with a drill motor, for example) pressurize the oil system until oil begins to run out the chip detector fitting. Stop pressurizing and re-install the chip detector core. Resume pressurizing for an additional 30 seconds. Check the engine oil sump level, and add oil as appropriate.
14.0 PROPELLER INSTALLATION
Thoroughly clean the prop flange and the mating prop hub with acetone, alcohol, or another evaporating cleaner (NOT GASOLINE). Install a new "O"-ring (of the size and type recommended by the prop manufacturer) and install the prop onto the flange, with the dowel holes in the proper orientation.
Use the tightening torque and sequence for the eight prop fasteners recommended by the prop manufacturer. In the absence of any such data, contact EPI for recommendations.
After the propeller fasteners have been properly torqued, check that the prop blades are within the manufacturer's limitations for blade tracking. It makes sense to accomplish this check prior to lockwiring the fasteners, in case there is a tracking problem, which will probably require removal of the prop to correct.
IF YOU HAVE NOT YET DONE THE INITIAL STARTUP, go back and re-read Section 13.
15.0 PROPELLER SERVO PURGE
Before attempting flight, the prop governor circuit must be purged of air. The center of the prop shaft requires approximately one quart of oil to fill it; the prop pitch servo requires an additional amount.
To accomplish this purge, run the engine at about 3000 ERPM and cycle the prop control lever from full-forward to full-back to full-forward.
DURING THIS OPERATION, IT IS ESSENTIAL THAT EACH CYCLE OF THE PROP CONTROL BE DONE QUICKLY, followed by a short pause before starting the next cycle. This is because when the prop control is exercised, the prop governor grabs a large portion of the oil being supplied to the gearbox, causing the gearbox oil pressure to drop to a very low level (you may even notice the engine oil pressure taking a nosedive). This only occurs when the prop shaft is full of air, and the governor is trying to pump more than a quart of oil into that space.
It will take several (perhaps 20 or 30) cycles of the prop control to accomplish the purge. Do not stop cycling as soon as the prop begins to respond. Continue cycling after the prop begins to respond to the lever, until the response of the prop is crisp and immediate.
After the purge is complete, check the engine oil sump level. It is likely that two additional quarts will be required.
16.0 ENGINE IDLE SPEED
The characteristics of the engine cam profiles, induction system, combustion chamber configuration, idle spark advance, and idle mixture quality will determine the quality of the engine ground idle.
After the preceding steps have been completed and the engine system has stabilized at running temperature, adjust the ground idle mixture and EPRM so that the smoothest possible idle is obtained.
IF YOU ARE USING A LIGHTWEIGHT PROP (MT, Hoffmann, Whirlwind, or the like) WE RECOMMEND THAT THE ENGINE GROUND-IDLE SPEED NOT BE SET ANY LOWER THAN 850 RPM BECAUSE OF THE TORSIONAL VIBRATION CHARACTERISTICS OF THE WHOLE SYSTEM. If you are using a metal-bladed prop, you can set the idle as low as will produce smooth operation.
17.0 EMERGENCIES
If the gearbox or the connection between the engine and gearbox fails with the engine generating any significant amount of power (any off-idle condition), or if the governor or governor drive mechanism fails at a high power setting, the engine will instantly destroy itself unless an effective rev-limiting device is installed as a part of the engine management system. If any such failure occurs in flight, the results could easily prove fatal to anyone on board.
If an engine runaway occurs, reduce the throttle setting immediately to get the engine off the rev limiter, and determine whether the prop and the engine are still connected.
If the engine seems to be connected to the propeller, the governor system may have failed. If this is the case, you will have a limited amount of power available (determined by the airspeed and the low-pitch adjustment of the propeller). Reduce airspeed to your normal pattern airspeed if enough power is available, or to the best-glide airspeed recommended in the Pilot's Operating Handbook (POH) if pattern speed cannot be maintained. Carefully plan and execute an emergency landing as soon as possible, keeping in mind the fact that a go-around will probably not be possible in this condition.
If the engine appears not to be connected to the propeller, it is likely that the drive system has failed. It is probable that the propeller will continue to rotate by windmilling, thereby providing governor control pressure. In this case, pull the prop control to the minimum RPM position to minimize drag (prop control lever pulled fully back) and to minimize the prospect of propeller overspeed. Reduce airspeed to best glide while maintaining or gaining altitude (convert excess speed energy into altitude energy), and prepare for an emergency forced landing.
ABOVE ALL, maintain airspeed and maintain control of the aircraft. Follow the instructions in the aircraft’s Pilot's Operating Handbook (POH) for the execution of a forced landing following an engine failure.